
Volvo XC60 Cabin Air Filter: Intervals, Fitment & Warning Signs
A genuinely distinctive finding: a dealer's own secret extra step, spraying a specific product on the evaporator coil, was what actually eliminated an annual mould smell — once the owner just changed the filter themselves, the smell came straight back.
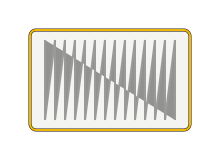 Illustration for editorial purposes
Opens live listings in a new tab.
OEM Part Number: 31407748
| Cabin air filter, XC60 (SPA platform) | Volvo OEM: 31407748 — shared with S60, S90, V60, V90, XC60, XC90; both standard and activated-carbon versions exist under this same reference, so confirm which type you're getting rather than assuming from the part number alone |
|---|---|
| Cars with IAQS (Interior Air Quality System) | Genuinely require the activated-carbon version to function correctly — the IAQS sensor detects pollutants like carbon monoxide and hydrocarbons, and the carbon filter is what actually absorbs them; fitting a plain paper filter to an IAQS-equipped car means the system detects pollution but can't filter it out, even though the paper filter physically fits the same housing |
Volvo XC60 Cabin Air Filter: Easy to Forget, Easy to Fix
This is one of the few parts on the Volvo XC60 that has zero effect on how the car actually drives — its whole job is air quality inside the cabin, which is exactly why it's so easy to let slide for years.
Volvo XC60 Cabin Air Filter: What It Does
Air entering the Volvo XC60's ventilation system passes through the cabin filter first, which traps dust and pollen, and on activated-carbon versions, some airborne odours too. It's entirely separate from the engine air filter — a different part doing a different job for the combustion process, not the cabin.
Opens live listings in a new tab.
A Genuinely Distinctive, Real Finding Worth Knowing About Persistent Smells — Volvo XC60 Cabin Air Filter
If a musty smell keeps returning despite regular filter changes, this is genuinely worth knowing: one documented case saw a dealer routinely resolve an annual mould smell during servicing, but once the owner began replacing the filter themselves without knowing what else the dealer had been doing, the smell persisted. On contacting the dealer directly, it emerged they'd also been spraying a specific evaporator disinfectant product onto the coil each time, a step distinct from simply fitting a new filter — worth knowing this additional treatment can be the genuine difference between a smell returning annually and staying away for good.
It's also genuinely worth knowing an honest, real access difficulty worth expecting: pushing the new filter back into its housing without removing the glovebox entirely is notoriously fiddly, with some owners needing six or more attempts to get it to seat properly. It's worth budgeting extra time and patience for this specific step rather than assuming you're doing something wrong if it doesn't slot in easily on the first try.
Volvo XC60 Cabin Air Filter: Warning Signs, DIY Difficulty & Aftermarket Advice
These are the same regardless of make or model — see our full Cabin Air Filter Guide for signs it needs changing, confirming fitment against your VIN, and choosing standard, carbon, or HEPA media.
More Volvo Cabin Air Filter
The same part, covered across other Volvo models.