
BMW 1 Series Rear Suspension: Specs, Fitment & Common Faults
A genuinely useful DIY finding: the trailing arm is held by just two bolts, but these must only be torqued at normal ride height using a jack to compress the suspension first, or the new bushing can wear prematurely.
 Illustration for editorial purposes
OEM Part Numbers
Often the Quieter Half of the Conversation
Front suspension tends to get most of the attention since it also handles steering, but the rear axle wears too — often more subtly, with symptoms that are easy to write off as road noise until they get worse.
What It Does
The rear suspension manages how the rear wheels respond to the road surface, working alongside the front suspension to control body movement and keep the car stable under braking and cornering. Depending on trim, the 1 Series uses different rear axle designs, which affects both ride character and which specific components need replacing when something wears.
Shop for This Part on eBay
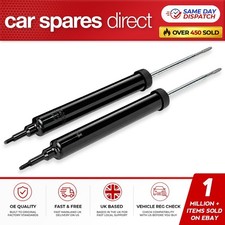 FOR BMW 1 SERIES E81 E82 E87 E88 REAR GAS SUSPENSION SHOCK ABSORBERS KIT PAIR X2
GBP 39.95
FOR BMW 1 SERIES E81 E82 E87 E88 REAR GAS SUSPENSION SHOCK ABSORBERS KIT PAIR X2
GBP 39.95
 NEW BMW 1-SERIES E87/E81 DRIVERS & PASSENGER REAR SUSPENSION CONTROL ARM SET X10
GBP 74.30
NEW BMW 1-SERIES E87/E81 DRIVERS & PASSENGER REAR SUSPENSION CONTROL ARM SET X10
GBP 74.30
 BMW 1 Series E87 118i N46 Rear Left N/S Spring Strut Leg Brake Suspension Hub
GBP 99.99
BMW 1 Series E87 118i N46 Rear Left N/S Spring Strut Leg Brake Suspension Hub
GBP 99.99
 Rear Suspension Strut Mount Kit For BMW 1 3 Series E81 E87 E90 E91 33526768544
GBP 27.99
Rear Suspension Strut Mount Kit For BMW 1 3 Series E81 E87 E90 E91 33526768544
GBP 27.99
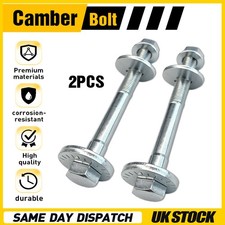 Rear Suspension Control Arm Camber Bolts For BMW 1 3 Series E81 E87 E90 E91 E92
GBP 18.99
Rear Suspension Control Arm Camber Bolts For BMW 1 3 Series E81 E87 E90 E91 E92
GBP 18.99
 For BMW 1 Series E87, E81 04-13 Rear Upper Left or Right Wishbone Suspension Arm
GBP 24.95
For BMW 1 Series E87, E81 04-13 Rear Upper Left or Right Wishbone Suspension Arm
GBP 24.95
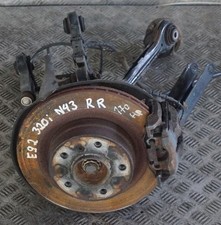 BMW E92 320i N43 Rear Right O/S Spring Strut Leg Brake Suspension Hub
GBP 99.99
BMW E92 320i N43 Rear Right O/S Spring Strut Leg Brake Suspension Hub
GBP 99.99
 BMW 1 3 Series E87 E90 Rear Right O/S Suspension Wheel Carrier Drive Flange Hub
GBP 39.95
BMW 1 3 Series E87 E90 Rear Right O/S Suspension Wheel Carrier Drive Flange Hub
GBP 39.95
As an eBay Partner, Car United may earn commission from qualifying purchases shown above. Listings and pricing are pulled live from eBay and may vary.
A Genuinely Useful DIY Finding Worth Knowing — BMW 1 Series Rear Suspension
If you're replacing a rear trailing arm or its bushings yourself, this is genuinely worth knowing: the arm itself is typically held in place by just two bolts, making the physical job reasonably straightforward, but these bolts must only be torqued to their final setting while the suspension is at its normal ride height. This is usually achieved by using a floor jack to compress the suspension before final tightening, worth doing this properly since torquing the bolts with the suspension hanging free or already at ride height can cause the new bushing to wear prematurely, undoing much of the benefit of the replacement.
It's also genuinely worth knowing that a four-wheel alignment is essentially mandatory after replacing any trailing arm or its bushings, to prevent uneven handling and premature tyre wear afterward.
Warning Signs, DIY Difficulty & Aftermarket Advice
These are the same regardless of make or model — see our full Rear Suspension Guide for symptoms to watch for (and which design — torsion beam or multi-link — your car actually has), confirming fitment against your VIN, and aftermarket guidance.
More BMW Rear Suspension
The same part, covered across other BMW models.